Pay By Link
This integration allows the merchant to request a payment by leveraging the various channels provided by Fabrick services, with the aim of presenting the buyer with the Fabrick payment page to choose a payment method, performing a direct redirect to a specific method (APM), or displaying the dedicated card data entry page.
The solution also allows you to define the validity period of the payment request and to configure the redirect URLs and server-to-server notification URL that the system will use at the end of the transaction.
By choosing this integration method, the merchant can achieve a quick implementation with minimal impact on their systems. Customization options are more limited compared to more advanced integrations, as the interface, authentication flows and redirects to other payment methods (APMs) are managed directly by Fabrick.
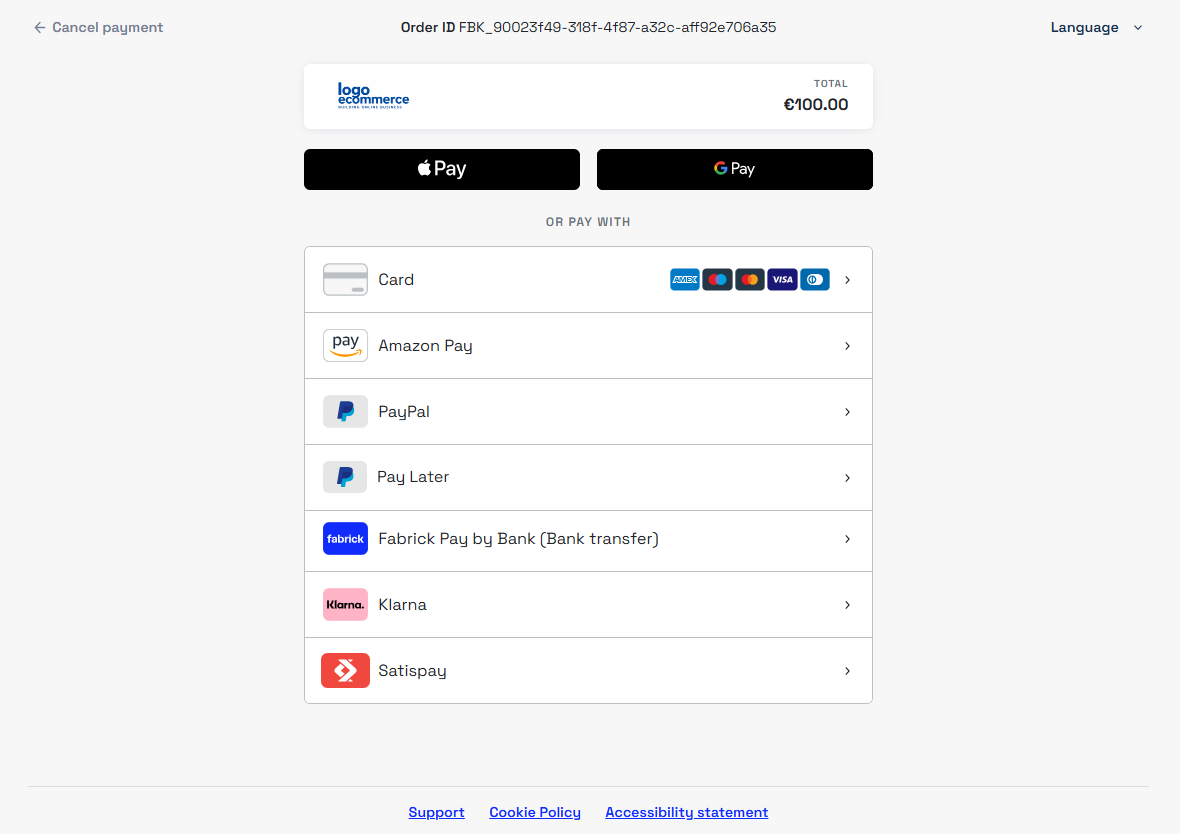
The Pay By Link service can also be used via the dashboard, which supports sending via SMS, offering an additional channel compared to API integration.
This method is suitable for merchants who want an immediate solution and do not require specific customizations or integrations with their own systems.
Pay By Link is optimized for browser-based usage and does not guarantee compatibility with channels such as WebView or native applications.
For these scenarios, it is possible to perform an external redirect from the app to the payment link, allowing the customer to complete the payment outside the application context. Alternatively, the API Only integration offers greater control over authentication flows and payment method management.
Payment Initialization
To initialize a payment request, the payment/create call must be used server-side.
This method ensures a higher level of security in payload generation and API key management, avoiding the exposure of sensitive information in the front-end.
The payment/create call forms the foundation of the payment request and can be extended with the specific parameters provided by the Pay By Link integration, which will be covered in the following sections.
It is also possible to expand the request by integrating other services provided by Fabrick, such as:
- the Risk Based Authentication service
- Tokenization features
- dedicated objects for individual payment methods
This flexibility allows the merchant to build a complete, customizable payment request aligned with their operational needs.
In the following sections we will go into detail about the use of the integration and the parameters to include in the call to customize the payment request.
Payment page presentation modes
The channelType object identifies the channel, or set of channels, through which the payment request is presented to the buyer. It is the only mandatory parameter for using the Pay By Link integration.
During request creation, by including the channelType object in the call, you can specify the desired channel or channels. The available options are:
LINK: used to request the generation of a payment URL.QRCODE: used to obtain a Base64 string, to be converted into a PNG image in order to display the QR Code to the buyer.EMAIL: used to send the payment request via email. In this case, thebuyerEmailfield must be included and populated with the buyer's email address, so that the system can deliver the communication.
By using multiple channels in the same request, for example LINK + EMAIL, the system will generate the payment link and simultaneously send the buyer an email containing the payment request.
Payment via Link
Using the LINK option, the system will return the payment URL in response, within the payload.userRedirect.href object.
This link can be used to redirect the customer or integrated into the frontend, for example via a button. Alternatively, it can be shared through other channels or included in personalised communications, such as an email containing the payment request.
Below is an example of a payment request using the LINK option and the corresponding response:
Request
POST /api/v1/payment/create
Host (sandbox): sandbox.gestpay.net
Host (produzione): ecomms2s.sella.it
Authorization: apikey ****************
Content-Type: application/json
{
    "shopLogin": "GESPAY12345",
    "amount": "100",
    "currency": "EUR",
    "shopTransactionID": "FBK_OrderID",
    "paymentChannel": {
        "channelType": [
            "LINK"
        ]
    }
}
Response
{
    "error": {
        "code": "0",
        "description": "request correctly processed"
    },
    "payload": {
        "paymentToken": "f0419188-8a78-4918-913c-a491e4e78084",
        "paymentID": "1881129911957",
        "userRedirect": {
            "href": "https://sandbox-web.axerve.com/orchestra/checkout/pbl/a/GESPAY12345/b/1881129911957/c/f0419188-8a78-4918-913c-b491e4e78084"
        },
        "qrCode": null
    }
}
Request validity period
During request creation, the validity of the payment link can be defined using the validityPeriod object, inserted within paymentChannel.
If the validityPeriod object is not set, the default validity is 48 hours.
Setting the start of validity
The validityPeriod.validityStart object allows you to specify the moment from which the payment request becomes active.
This object accepts two parameters, but only one can be used at a time to indicate the start of the payment request's validity:
minutesFromNow: defines the start of payment validity after X minutes from the payment initialization request sent to Fabrick.UTCDateTime: defines the start date of payment validity (UTC format, e.g.: yyyy-mm-ddThh24:mm:ss).
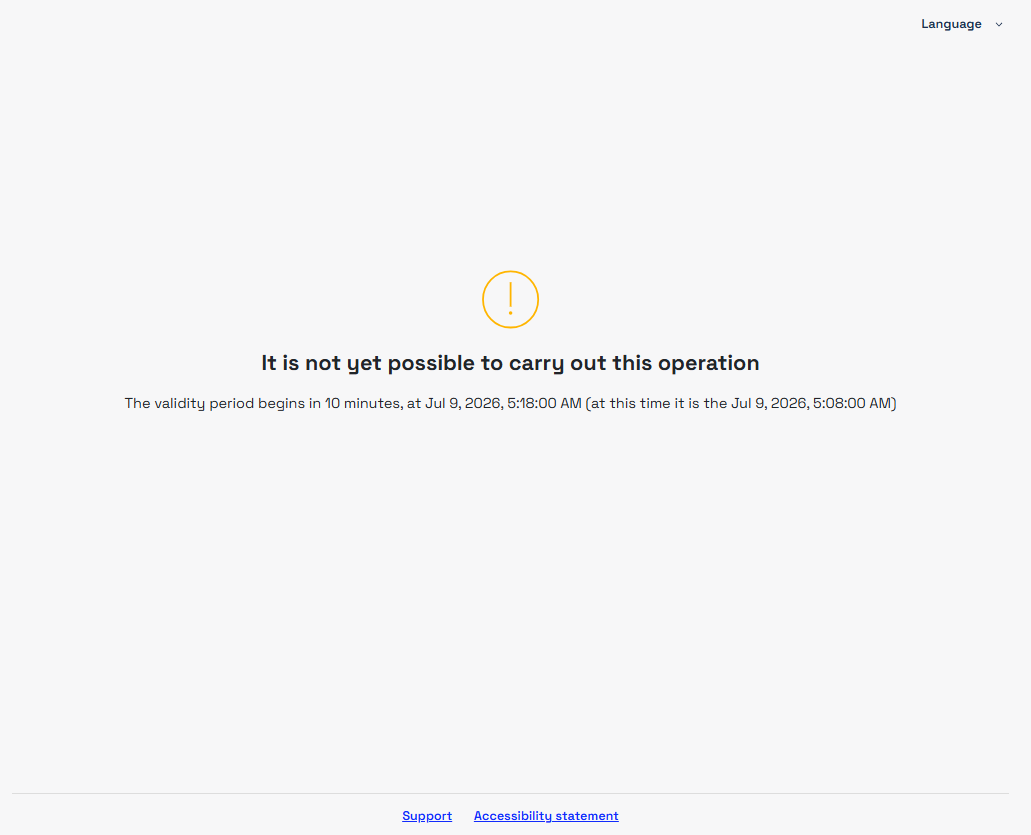
If the buyer accesses the link before the validity period begins, they will see a notice indicating that the payment request is not yet available, along with the date and time from which payment can be made.
Example notice:
Setting the end of validity
The validityPeriod.validityEnd object allows you to indicate when the payment request will no longer be valid. Again, only one of the following parameters can be used:
minutesFromNow: indicates the expiry after X minutes from the creation of the request.UTCDateTime: defines the expiry via date and time in UTC format.validityMinutes: validity duration expressed in minutes, calculated from the start set invalidityStart.
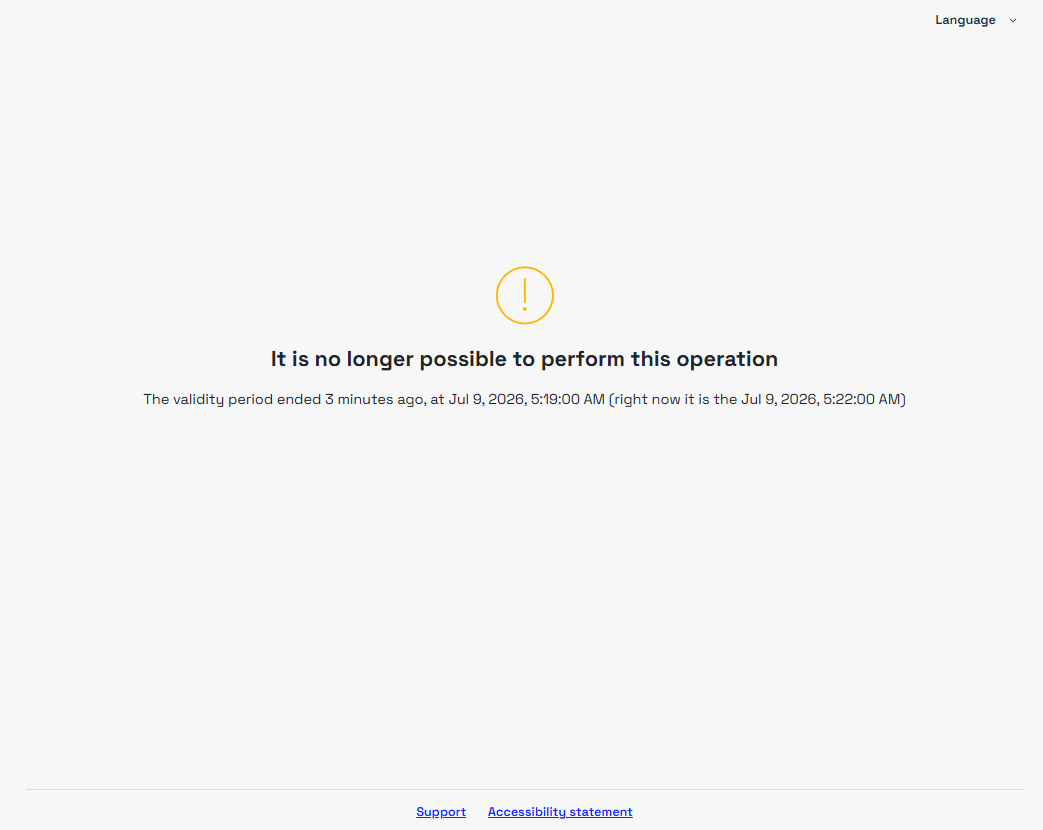
If the buyer accesses the link after it has expired, the system will display a notice informing them that the payment request is no longer valid.
Example notice:
Both validityStart and validityEnd can be used together to define a specific time interval.
The maximum configurable duration is 49 hours.
Below is an example request in which the payment link becomes valid 10 minutes after generation and remains active for the following 50 minutes, with an overall expiry of 60 minutes from creation.
Request
POST /api/v1/payment/create
Host (sandbox): sandbox.gestpay.net
Host (production): ecomms2s.sella.it
Authorization: apikey ****************
Content-Type: application/json
{
  "shopLogin": "GESPAY12345",
  "amount": "100",
  "currency": "EUR",
  "shopTransactionID": "FBK_OrderID",
  "paymentChannel":{
    "channelType":["LINK"],
    "validityPeriod":{
      "validityStart":{
        "minutesFromNow": "10",
        "UTCDateTime": "" //yyyy-mm-ddThh24:mm:ss - e.g. 2025-06-29T13:14:00
      },
      "validityEnd":{
        "minutesFromNow": "60",
        "UTCDateTime": "",
        "validityMinutes": "" //minutes from validity starting timestamp; can have a value only when minutesFromNow and UTCDateTime are not set
      }
    }
  }
}
Direct redirect to the card data entry page or to a payment method (APM)
During request creation, if the shopLogin is enabled for multiple payment methods (APMs), the paymentType object can be used in the payment/create call to specify which methods to present on the page. If only one payment method is specified, the system will redirect the buyer directly to that service without going through the selection page.
If instead you want to redirect the buyer to the dedicated card data entry page provided by Fabrick without going through the method selection page, the CREDITCARD paymentType must be specified in the call. By specifying this object, wallet payment methods such as ApplePay, GooglePay and Click to Pay will also be shown if enabled.
If the paymentType object is not used in the call, all payment methods enabled for the shopLogin will be shown on the payment page according to the configurations set in the Gestpay backoffice, and the buyer will be able to choose which payment method to proceed with.
The possible values of paymentType are available in the payment type codes section, or alternatively the GET shop/paymentMethods endpoint can be used to check in real time the payment methods enabled for the shopLogin in use and filter the response by payload.paymentMethod.paymentType.
Below is an example request in which only one payment method (APM) is specified. In this case, the buyer will be redirected directly to the service page without going through the method selection page.
Request
POST /api/v1/payment/create
Host (sandbox): sandbox.gestpay.net
Host (production): ecomms2s.sella.it
Authorization: apikey ****************
Content-Type: application/json
{
  "shopLogin": "GESPAY12345",
  "amount": "100",
  "currency": "EUR",
  "shopTransactionID": "FBK_OrderID",
  "paymentType":["FABRICKPASS"],
  "paymentChannel":{
    "channelType":["LINK"]
  }
}
If instead multiple payment methods are specified, for example CREDITCARD and FABRICKPASS, the buyer will be redirected to the payment method selection page where they can choose how to proceed, limiting the choice to only those specified in the call.
Request
POST /api/v1/payment/create
Host (sandbox): sandbox.gestpay.net
Host (production): ecomms2s.sella.it
Authorization: apikey ****************
Content-Type: application/json
{
  "shopLogin": "GESPAY12345",
  "amount": "100",
  "currency": "EUR",
  "shopTransactionID": "FBK_OrderID",
  "paymentType":["CREDITCARD", "FABRICKPASS"],
  "paymentChannel":{
    "channelType":["LINK"]
  }
}
Order confirmation page and server-to-server notification
During request creation, the responseURLs object can be used to dynamically define the redirect URLs and the server-to-server notification URL, which the system will use at the end of the transaction, both in case of a successful and a failed outcome.
When the responseURLs object is included in the call, the system will use the URLs specified in the request for that transaction only, and will not use the URLs configured in the Gestpay backoffice. If the object is not present, the backoffice configurations will be used instead.
It is also possible to specify only some of the parameters. For example, if only the server-to-server notification URL or only one of the redirect URLs is set, the system will override only the specified values, continuing to use the other URLs configured in the Gestpay backoffice.
Below is an example request in which all redirect URLs and the server-to-server notification URL are defined.
Request
POST /api/v1/payment/create
Host (sandbox): sandbox.gestpay.net
Host (production): ecomms2s.sella.it
Authorization: apikey ****************
Content-Type: application/json
{
  "shopLogin": "GESPAY12345",
  "amount": "100",
  "currency": "EUR",
  "shopTransactionID": "FBK_OrderID",
  "paymentChannel": {
    "channelType": ["LINK"]
  },
  "responseURLs": {
    "buyerOK": "https://merchant-url-ok.com",
    "buyerKO": "https://merchant-url-ko.com",
    "serverNotificationURL": "https://merchant-url-s2s.com"
  }
}
Transaction Detail and Payment Notification
At the end of the payment, the buyer is redirected to the success or failure URL. At the same time, the system also sends a server-to-server (S2S) notification with the transaction outcome.
Example redirect URL and S2S notification:
https://merchant-url.com?a=GESPAY12345&Status=OK&paymentID=1360119538182&paymentToken=8a901523-67a5-4aca-bbd2-c7c412934289
The redirect URL and the S2S notification both contain the Status parameter, which allows you to immediately identify the payment status. The possible values are:
OK: payment completed successfullyKO: payment completed with a negative outcomeXX: payment in a suspended state, awaiting the final outcome.
The XX status is used only for certain alternative payment methods (APMs) and is returned when the outcome is asynchronous. In this scenario, Fabrick redirects the customer to the success URL, but the status is not yet final: a subsequent S2S notification will need to be awaited to communicate the final outcome (OK or KO).
- If you receive the XX status, do not proceed with shipping the goods or providing the service.
- Wait for the S2S notification that will communicate the final payment outcome.
To verify the outcome or the updated status of the transaction, the GET payment/detail endpoint can be used, passing the paymentID returned by the payment/create call or obtained from the redirect/S2S notification URL as a parameter.
The response contains the transactionResult parameter, which indicates the payment status. The possible values are:
AUTHENTICATED: payment authenticated (OK)APPROVED: payment approved (OK)DECLINED: payment declined (KO)PENDING: payment awaiting confirmation (XX)WAITING: payment in progress (XX)UNSUBMITTED: payment not yet started (XX)
Example call to check the transaction status via paymentID.
Request
GET api/v1/payment/detail/{paymentID}
Host (sandbox): sandbox.gestpay.net
Host (production): ecomms2s.sella.it
Authorization: apikey **************** (or) PaymentToken: 8a901523-67a5-4aca-bbd2-c7c412934289
Content-Type: application/json
Response
{
    "error": {
        "code": "0",
        "description": "request correctly processed"
    },
    "payload": {
        "transactionType": "detail",
        "transactionResult": "APPROVED",
        "transactionState": "AUT",
        "transactionErrorCode": "0",
        "transactionErrorDescription": "Transazione correttamente effettuata",
        "bankTransactionID": "1825",
        "shopTransactionID": "FBK_OrderID",
        "shopTransactionID_2": "",
        "authorizationCode": "794183",
        "paymentID": "1610469726440",
        "currency": "EUR",
        "country": "ITALIA",
        "company": "VISA",
        "tdLevel": "FULL",
        "threeDS": {
            "authenticationResult": {
                "authenticationLevel": "2C",
                "authenticationStatus": "Y",
                "authStatusReason": "",
                "challengeResultTransStatus": "",
                "XID": "1dd3cf75-92a7-4487-abb5-b1f3cdd68f3b",
                "AV": "MTIzNDU2Nzu5MDA5ODc2NTQzMjE=",
                "ECI": "05",
                "AVAlgorithm": "",
                "threeDsVersion": "2.2.0"
            },
            "transDetails": {
                "authData": "",
                "authMethod": "02",
                "authTimeStamp": "202505131259",
                "acsID": "f688e45c-ff27-4ba6-a631-4b68df2dbf99"
            }
        },
        "events": [
            {
                "event": {
                    "eventtype": "AUT",
                    "eventamount": "0.00",
                    "eventdate": "13/05/25 13:01:52",
                    "eventARN": "",
                    "eventID": "",
                    "eventReferred": ""
                }
            }
        ],
        "buyer": {
            "name": "",
            "email": ""
        },
        "risk": {
            "riskResponseCode": "",
            "riskResponseDescription": ""
        },
        "customInfo": null,
        "alertCode": "",
        "alertDescription": "",
        "cvvPresent": "TRUE",
        "dcc": null,
        "maskedPAN": "",
        "paymentMethod": "VISA",
        "productType": "Credit",
        "token": "40G5LMXUQQ613101",
        "tokenExpiryMonth": "05",
        "tokenExpiryYear": "27",
        "tokenDetails": {
            "TokenValue": "40G5LMXUQQ613101",
            "TokenExpiryMonth": "05",
            "TokenExpiryYear": "27",
            "TokenProvider": "AXERVE",
            "CardDetails": {
                "CardSuffix": "3101",
                "CardExpiryMonth": "05",
                "CardExpiryYear": "27",
                "CardHolderName": null
            },
            "CardAssets": {
                "CardArt": {
                    "Type": null,
                    "MediaContents": null,
                    "Height": null,
                    "Width": null
                },
                "BrandLogo": {
                    "Type": null,
                    "MediaContents": null,
                    "Height": null,
                    "Width": null
                }
            }
        },
        "fraudPrevention": {
            "check": "FALSE",
            "state": "",
            "description": "",
            "order": ""
        },
        "automaticOperation": {
            "type": "CAN",
            "date": "07/06/25 00:00:00",
            "amount": "0.00"
        }
    }
}